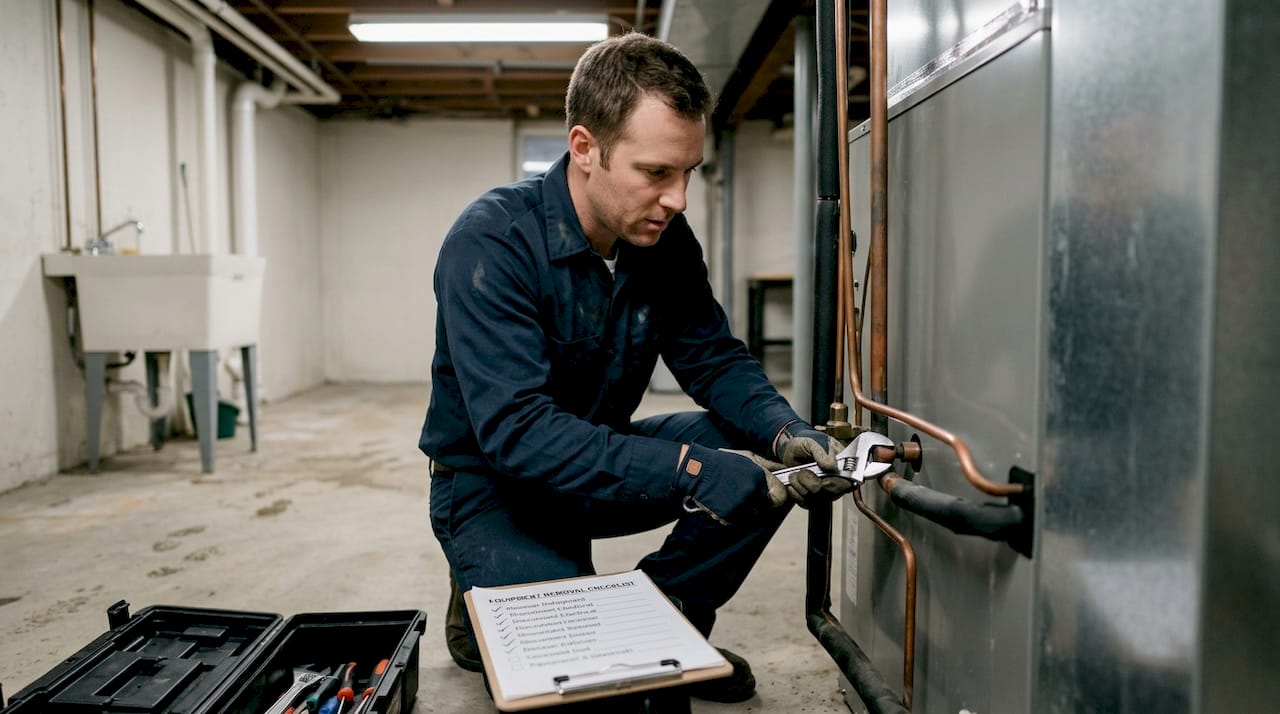
Removing a heat pump without proper knowledge can void your warranty, release harmful refrigerants into the environment, and create serious safety hazards for your home. Whether you’re a homeowner considering a DIY project or a professional seeking detailed guidance, understanding the correct removal process is essential. This comprehensive guide walks you through every stage of heat pump dismantling, from initial preparation and safety protocols to proper disposal methods. You’ll learn about critical steps like nitrogen purging, pressure testing, and refrigerant recovery that protect both your property and the environment while ensuring compliance with Canadian regulations.
Table of Contents
- Key takeaways
- Understanding heat pump removal essentials
- Preparing for heat pump removal safely
- Step-by-step guide to heat pump removal
- Common mistakes and troubleshooting during heat pump removal
- Ready for professional heat pump removal?
- FAQ about heat pump removal steps
Key Takeaways
| Point | Details |
|---|---|
| Warranty and safety risks | Removing a heat pump without proper knowledge can void warranties, create safety hazards, and risk environmental harm. |
| Preparation and safety gear | Thorough preparation and protective equipment are essential before any removal work to prevent accidents. |
| Post removal procedures | Nitrogen purging, pressure testing, and refrigerant recovery are critical steps to protect the system and environment and to meet regulations. |
| Backup systems considerations | Backup boilers and radiators require different removal planning than the heat pump itself, depending on future heating plans. |
Understanding heat pump removal essentials
Heat pumps typically last between 10 and 15 years before requiring replacement or removal. As your system approaches this age, you might notice decreased efficiency, frequent repairs, or complete system failure. Understanding when and why removal becomes necessary helps you plan appropriately and avoid costly mistakes.
DIY heat pump removal carries significant risks that many homeowners underestimate. Refrigerant mishandling can result in hefty fines under Canadian environmental regulations, whilst improper electrical disconnection poses serious shock hazards. Empirical data shows pros ensure compliance and efficiency avoiding warranty voids and injury during removal. Professional technicians possess the specialised equipment and training to handle these dangers safely.
Legal and environmental considerations make professional removal even more critical. Canadian law requires proper refrigerant recovery and disposal through certified channels. Releasing refrigerants into the atmosphere violates federal environmental protection acts and can trigger substantial penalties. Additionally, most manufacturer warranties explicitly state that unauthorised removal voids all coverage, leaving you responsible for any subsequent damage or replacement costs.
Several technical terms appear throughout the removal process that you should understand. Nitrogen purging involves flowing nitrogen gas through refrigerant lines during brazing to prevent oxidation and contamination. Brazing refers to joining metal components using high heat and filler metal. Pressure testing checks system integrity by pressurising lines to detect leaks before refrigerant charging. These procedures require specialised knowledge and equipment.
Backup boilers and radiators present separate considerations during heat pump removal. Many Canadian homes retain traditional heating systems as backup when installing heat pumps. Whether you remove radiators depends on your future heating plans and home layout. Backup boilers aren’t part of the heat pump system itself, so their removal involves different plumbing and heating considerations.
Pro Tip: Document your heat pump’s model number, installation date, and maintenance history before beginning removal. This information proves invaluable when coordinating with professionals or planning replacement systems.
Exploring heat pump replacement benefits helps you understand whether removal leads to upgrade opportunities. Modern systems offer significantly improved efficiency ratings and smart home integration that older units lack. Timing your removal to coincide with seasonal rebate programmes can offset replacement costs substantially.
Preparing for heat pump removal safely
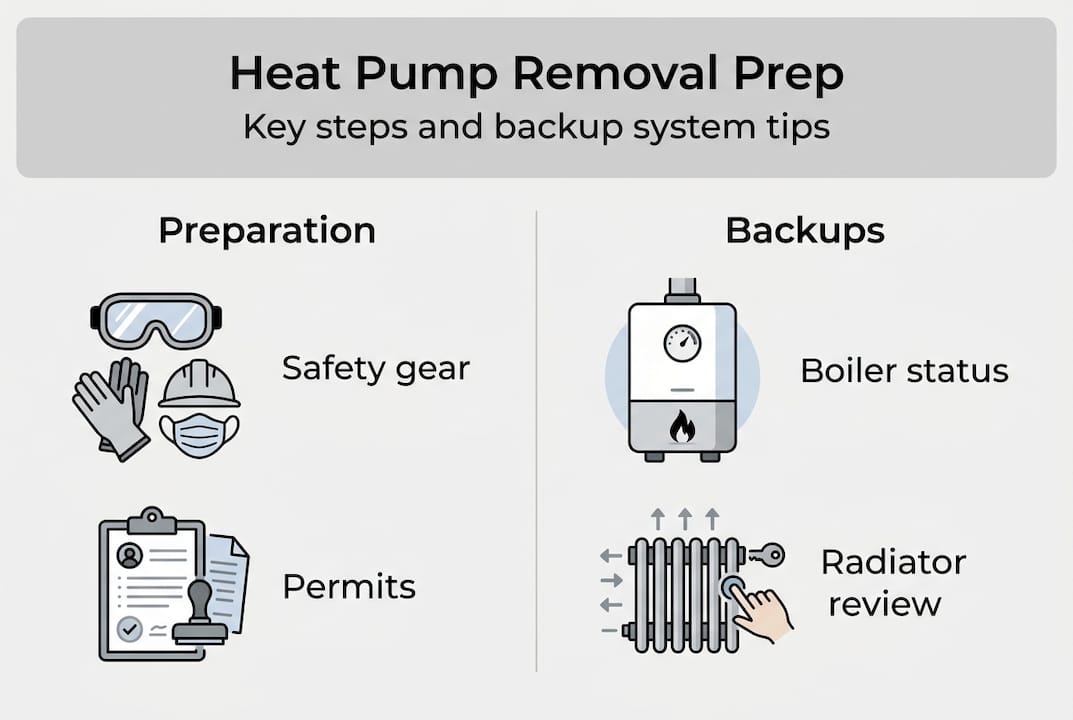
Proper preparation prevents accidents and ensures smooth removal. Before touching any component, gather all necessary tools and protective equipment. You’ll need adjustable wrenches, screwdrivers, refrigerant recovery equipment, nitrogen cylinders, pressure gauges, and brazing tools. Never attempt removal without complete equipment availability.
Personal protective equipment isn’t optional during heat pump work. Safety glasses protect against refrigerant spray and metal debris. Insulated gloves prevent electrical shock and chemical burns. Steel-toed boots guard against dropped components. Respirators filter harmful vapours during refrigerant recovery. Always pressure test post-disassembly and use PPE to ensure safety throughout the process.
System shutdown follows specific sequences to prevent damage. First, turn off the main electrical breaker supplying the heat pump. Verify power cessation using a voltage tester at the disconnect box. Next, close the service valves on both refrigerant lines to isolate the outdoor unit. Allow the system to equalise for at least 30 minutes before proceeding with refrigerant recovery.
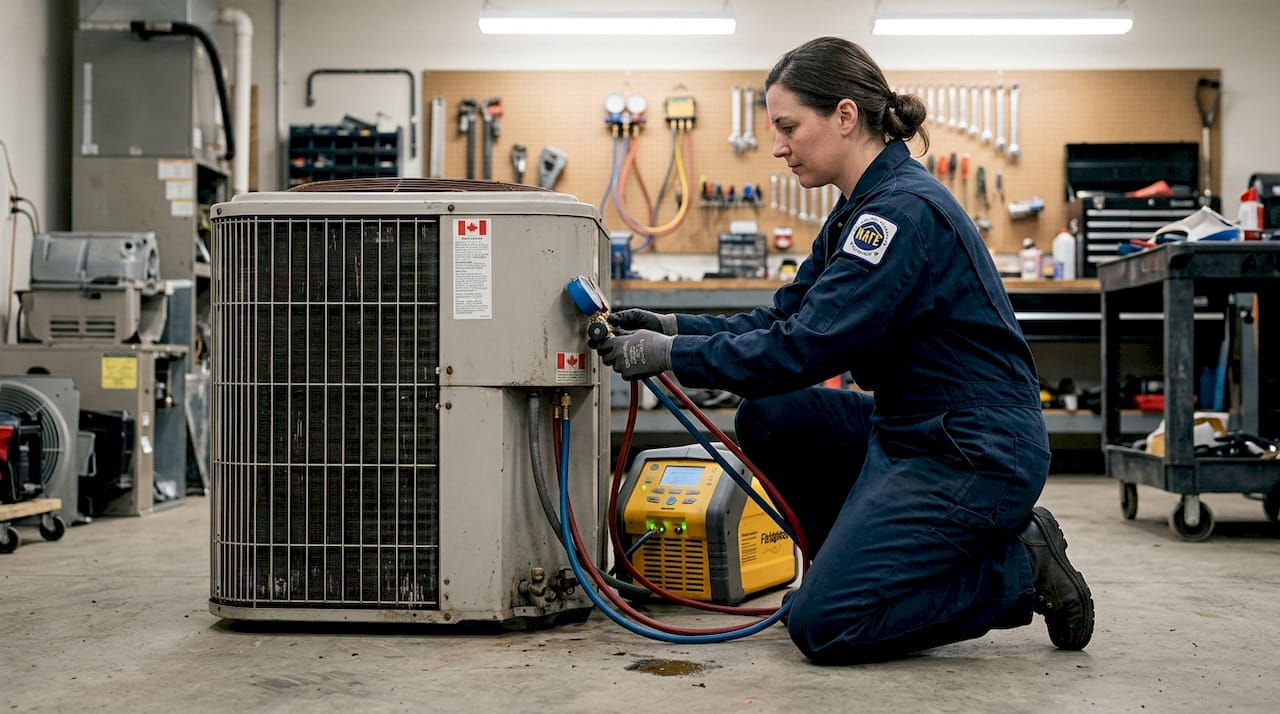
Refrigerant recovery requires certified equipment and licensing in Canada. Recovery machines connect to both service ports and extract refrigerant into approved storage cylinders. This process must capture at least 95% of the system charge to meet environmental standards. Never vent refrigerant directly to atmosphere, as this violates federal law and harms the ozone layer.
Local permits and regulations vary across Canadian municipalities. Some jurisdictions require permits for heat pump removal, particularly when electrical or gas connections are involved. Contact your municipal building department weeks before planned removal to understand specific requirements. Failing to obtain necessary permits can result in fines and complications when selling your property.
| Preparation requirement | Specification | Purpose |
|---|---|---|
| Safety glasses | ANSI Z87.1 rated | Eye protection from refrigerant and debris |
| Insulated gloves | Class 0 minimum | Electrical shock prevention |
| Refrigerant recovery machine | EPA certified | Legal refrigerant capture |
| Nitrogen cylinder | Industrial grade | Line purging during brazing |
| Pressure gauge set | 0-500 PSI range | System integrity testing |
| Building permit | Municipal requirement | Legal compliance verification |
Pro Tip: Schedule removal during mild weather when heating demands are low. This gives you flexibility if unexpected complications arise and prevents leaving your home without climate control during extreme temperatures.
Reviewing a comprehensive heat pump removal checklist ensures you don’t overlook critical preparation steps. Professional checklists include items many homeowners forget, like photographing wiring configurations before disconnection and labelling all components for potential reinstallation elsewhere.
Step-by-step guide to heat pump removal
Follow these sequential steps to safely dismantle your heat pump system. Each stage builds on the previous one, so never skip ahead or reverse the order. Rushing through removal creates dangerous situations and potential system damage.
-
Disconnect all electrical power at the main breaker and outdoor disconnect box. Use a voltage tester to confirm zero power at all connection points. Lock out the breaker using a safety tag to prevent accidental reconnection during work.
-
Recover refrigerant completely using certified recovery equipment. Connect hoses to both liquid and vapour service ports. Run the recovery machine until gauges show zero pressure and no refrigerant remains in the system. Transfer recovered refrigerant to approved storage cylinders.
-
Disconnect refrigerant lines at the outdoor unit using proper wrenches. Cap all open ports immediately to prevent moisture and debris entry. Expert nuance: Always pressure test post-disassembly, use PPE, nitrogen purge for brazing to ensure safe removal throughout the process.
-
Remove electrical wiring from the outdoor unit after photographing all connections. Label each wire with its terminal designation using weatherproof tags. Store wiring safely if you plan to reinstall a replacement unit in the same location.
-
Unbolt the outdoor unit from its mounting pad or brackets. Heat pumps typically weigh between 45 and 90 kilograms, so use proper lifting techniques or mechanical assistance. Never attempt to move heavy units alone.
-
Disconnect indoor components including the air handler and thermostat. Remove ductwork connections carefully to avoid damaging surrounding materials. Seal duct openings with temporary covers to prevent dust infiltration.
-
Perform nitrogen purging if you’re brazing any connections during the process. Flow nitrogen through lines whilst heating joints to prevent oxidation. This step proves critical for maintaining system cleanliness in replacement installations.
-
Conduct final pressure testing on any sealed sections remaining in your home. Pressurise lines to 150 PSI using nitrogen and monitor for 24 hours. Any pressure drop indicates leaks requiring repair before new equipment installation.
Backup boilers and radiators require separate assessment. If you’re keeping your backup heating system, leave all boiler connections intact. Radiator removal depends on whether you’re transitioning to a different heating method entirely. Consult with heating professionals about the implications of removing hydronic heating components.
Proper disposal follows environmental regulations strictly. Scrap metal recyclers accept heat pump components after refrigerant recovery. Some manufacturers offer take-back programmes for old equipment. Never place heat pumps in regular waste collection, as this violates hazardous waste regulations.
“Professional removal ensures every step meets safety standards and environmental regulations. The investment in certified technicians prevents costly mistakes and protects your home’s heating infrastructure for future upgrades.”
Pro Tip: Take detailed photos at every removal stage. These images help troubleshoot issues during replacement installation and provide documentation if warranty or insurance questions arise later.
Following detailed heat pump removal steps from certified professionals ensures you don’t miss critical safety procedures. Professional guides include troubleshooting tips for common complications like seized bolts or corroded electrical connections.
Common mistakes and troubleshooting during heat pump removal
Homeowners and even some inexperienced professionals make predictable errors during heat pump removal. Recognising these mistakes helps you avoid them and understand when professional intervention becomes necessary.
Skipping pressure testing ranks amongst the most common errors. Many assume empty refrigerant lines need no testing, but pressure tests reveal hidden leaks that cause problems during replacement installation. Always test system integrity even after complete refrigerant recovery. Inadequate PPE usage creates unnecessary risks. Some workers skip respirators during refrigerant recovery or work without insulated gloves near electrical components. Every safety item serves a specific purpose in preventing injury.
Improper refrigerant handling generates both legal and environmental consequences. Venting refrigerant to atmosphere seems faster than proper recovery, but this shortcut violates federal law and damages the environment. Using uncertified recovery equipment or skipping recovery entirely can result in fines exceeding several thousand dollars. Ignoring nitrogen purging during brazing introduces contaminants that reduce replacement system efficiency and lifespan.
Backup boiler and radiator decisions confuse many homeowners. Forums debate whether to keep backup boilers after heat pump install; radiators may be removed but are not core to pump removal. Consider these factors when deciding:
| Factor | Keep backup system | Remove backup system |
|---|---|---|
| Climate | Extremely cold winters | Mild winter temperatures |
| Reliability concerns | Want heating redundancy | Trust heat pump fully |
| Cost | Maintain existing equipment | Eliminate maintenance expenses |
| Space | Limited options for equipment | Need space for other uses |
| Resale value | Buyers prefer backup heat | Modern systems sufficient |
Troubleshooting refrigerant leaks during removal requires systematic diagnosis. If pressure tests fail, spray soapy water on all joints and connections whilst the system remains pressurised. Bubbles indicate leak locations. Small leaks might require re-brazing joints before proceeding. Large leaks suggest component damage that needs addressing before replacement installation.
Electrical issues sometimes emerge during disconnection. Corroded wiring or seized breakers complicate simple shutdowns. Never force electrical components. If breakers won’t trip or wiring appears damaged, contact an electrician before proceeding. Working with compromised electrical systems creates serious shock and fire hazards.
Knowing when to engage professionals saves time and prevents disasters. If you encounter refrigerant leaks, electrical problems, structural mounting issues, or lack proper equipment, stop immediately. Attempting to push through complications without expertise often creates more expensive problems than the cost of professional help.
Pro Tip: Keep a removal log documenting each step, time spent, and any complications encountered. This record helps professionals diagnose issues quickly if you need to call for assistance partway through the project.
Learning about heat pump removal common mistakes from industry experts provides insights beyond basic guides. Professional perspectives highlight nuanced issues that only emerge through years of field experience.
Ready for professional heat pump removal?
Whilst this guide provides comprehensive removal knowledge, many homeowners recognise that professional expertise offers peace of mind and guaranteed results. CoolFix specialises in heat pump removal, replacement, and comprehensive appliance repair services throughout Canadian communities. Our certified HVAC technicians handle every aspect of heat pump dismantling with precision, from refrigerant recovery to final disposal.

Our team brings years of experience managing complex removal scenarios, including systems with backup boilers, challenging mounting locations, and aged equipment requiring extra care. We ensure full compliance with Canadian environmental regulations whilst protecting your home’s heating infrastructure. Beyond heat pump services, CoolFix offers complete appliance repair services to address all your home comfort needs under one trusted provider.
Explore our detailed heat pump replacement tutorial to understand how professional removal integrates with efficient new system installation. When you’re ready to discuss your specific removal needs, our guide on choosing the right HVAC contractor helps you ask the right questions and select qualified professionals for your project.
FAQ about heat pump removal steps
Is it safe for homeowners to remove their own heat pump?
Homeowners can safely remove heat pumps only if they possess refrigerant handling certification, proper recovery equipment, and comprehensive HVAC knowledge. Most homeowners lack these qualifications, making professional removal the safer choice. DIY removal risks warranty voids, environmental violations, and personal injury from electrical shock or refrigerant exposure.
How often should heat pumps be professionally inspected before removal?
Schedule professional inspections annually throughout your heat pump’s lifespan, with a final assessment when considering removal. This final inspection determines whether repair or replacement makes better financial sense. Technicians evaluate refrigerant levels, electrical connections, and overall system condition to guide your removal decision.
What happens if refrigerant is released improperly during removal?
Improper refrigerant release violates Canadian environmental protection acts and can trigger fines ranging from $5,000 to $50,000 depending on the substance and quantity. Beyond legal consequences, released refrigerants damage the ozone layer and contribute to climate change. Always use certified recovery equipment and proper disposal channels.
Can radiators always be removed after installing a heat pump?
Radiators can technically be removed after heat pump installation, but many Canadian homeowners retain them as backup heating during extreme cold. Removal depends on your climate zone, backup heating preferences, and whether you’re keeping your boiler system. Consult heating professionals about implications for your specific situation before removing hydronic heating components.
What is nitrogen purging and why is it important?
Nitrogen purging involves flowing nitrogen gas through refrigerant lines during brazing to prevent oxidation and contamination inside copper tubing. This process keeps lines clean by displacing oxygen that would otherwise create scale and debris during high-temperature brazing. Clean lines ensure optimal efficiency and longevity in replacement heat pump systems.
Recommended
- Heat Pump Replacement Tutorial for Canadian Homeowners – CoolFix Appliance & HVAC Service
- Master Heat Pump Repair Workflow for Canadian HVAC Techs – CoolFix Appliance & HVAC Service
- Step by Step Heat Pump Repair for Canadian Homeowners – CoolFix Appliance & HVAC Service
- Appliance Repair Heat Pump Guide for Efficient Maintenance – CoolFix Appliance & HVAC Service
0 Comments