

Every Canadian HVAC technician knows that heat pump service calls can quickly become complex if the workflow is not razor-sharp. Tight schedules and challenging systems demand more than basic troubleshooting—they require a precise, documented repair process that protects your safety and ensures top customer satisfaction. By following proven diagnostic checklists, using critical tools, and adopting meticulous documentation practices, you can confidently transform chaotic repair scenarios into efficient, professional service outcomes.
Table of Contents
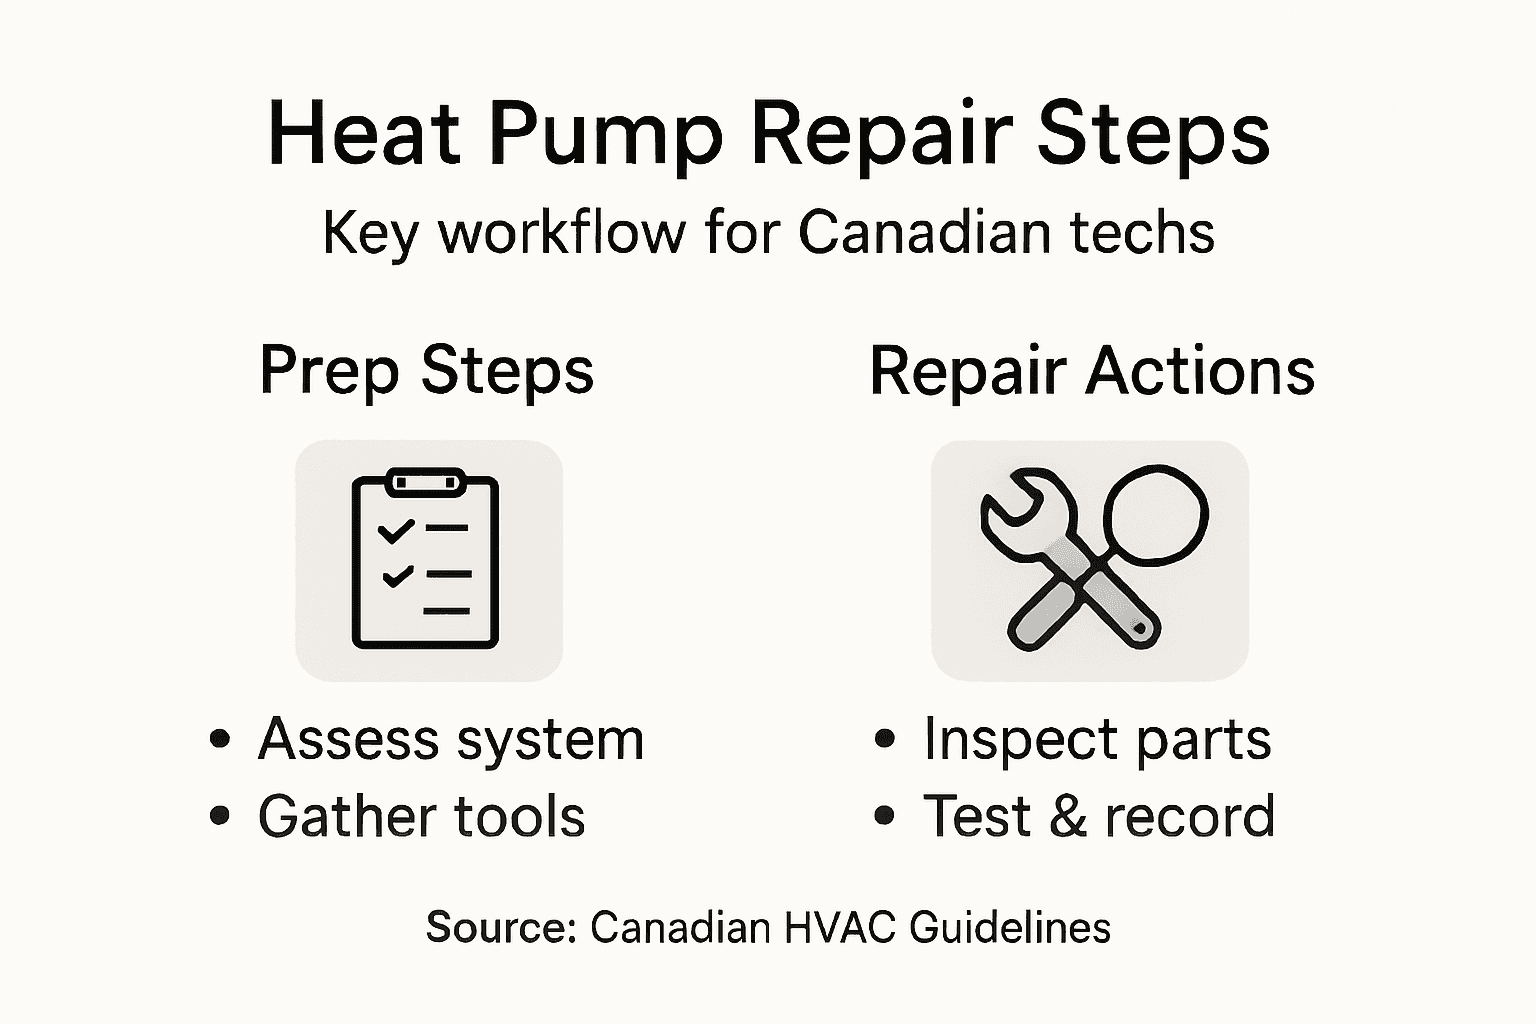
- Step 1: Assess System Status And Diagnose Faults
- Step 2: Prepare Tools And Secure Worksite
- Step 3: Inspect Electrical And Refrigerant Components
- Step 4: Repair Or Replace Defective Parts
- Step 5: Test System For Proper Operation
- Step 6: Document Service And Customer Feedback
Quick Summary
| Key Point | Explanation |
|---|---|
| 1. Systematic Diagnostics Are Key | A thorough inspection and testing help identify specific heat pump issues accurately. Use precision tools for reliable assessments. |
| 2. Prepare an Organized Workspace | A well-structured and safe work area is essential for efficiency and safety during heat pump repairs. |
| 3. Detailed Documentation is Crucial | Keeping meticulous records of repairs and performance supports future maintenance and enhances service transparency. |
| 4. Address Issues Promptly | Minor discrepancies in system performance can escalate into major problems if not addressed quickly. |
| 5. Engage Customer Feedback | Encouraging customer reviews not only improves services but also builds trust and accountability within the repair process. |
Step 1: Assess system status and diagnose faults
Diagnosing heat pump system issues requires systematic and strategic troubleshooting to pinpoint exact performance problems. Your initial assessment determines whether you’re dealing with minor calibration challenges or more significant mechanical failures that demand comprehensive repair strategies.
To effectively diagnose heat pump faults, follow these critical inspection steps:
- Verify electrical connections for any signs of wear or corrosion
- Check refrigerant pressure levels using precision gauges
- Inspect compressor functionality and listen for unusual operational sounds
- Review thermostat communication and sensor response times
- Examine external unit components for physical damage or environmental wear
Begin your diagnostic process by performing a comprehensive visual and operational inspection. Systematically test each system component, recording precise measurements and comparing them against manufacturer specifications. Critical diagnostic tools like multimeters, pressure gauges, and infrared thermometers will help you collect accurate performance data.
Here’s a summary of how various diagnostic tools contribute to heat pump troubleshooting:
| Tool | Main Function | Typical Application |
|---|---|---|
| Multimeter | Tests voltage and resistance | Verifies electrical integrity |
| Pressure Gauge | Measures refrigerant pressure | Assesses system charge level |
| Infrared Thermometer | Monitors surface temperatures | Detects abnormal heat zones |
| Superheat Calculator | Calculates refrigerant state | Optimizes system efficiency |
Effective heat pump diagnostics rely on methodical testing and precise measurement – not guesswork.
Understand that temperature differentials, airflow measurements, and electrical system performance are interconnected. A seemingly minor issue in one subsystem can cascade into broader mechanical complications if not addressed promptly.
Pro tip: Always document your diagnostic findings meticulously, creating a detailed record that supports future troubleshooting and helps track the heat pump system’s maintenance history.
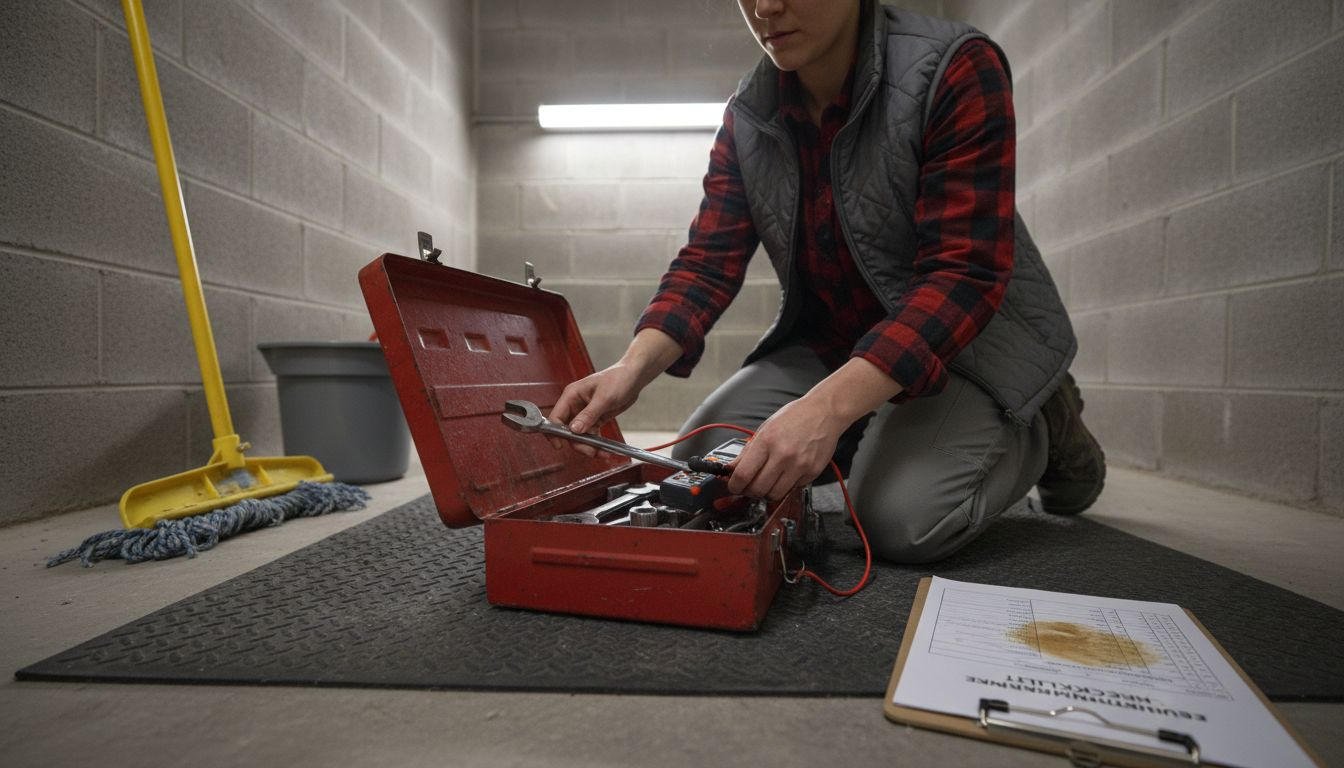
Step 2: Prepare tools and secure worksite
Before diving into heat pump repair, setting up a safe and organized workspace is crucial for efficient and professional service. Preparing your toolkit and securing the work environment ensures you can tackle the job effectively while maintaining maximum safety standards.
Begin by assembling your essential diagnostic and repair equipment:
- Hand tools: Screwdrivers, adjustable wrenches, pliers
- Electrical instruments: Multimeter, voltage tester
- Refrigeration equipment: Manifold gauge set, vacuum pump
- Specialized heat pump tools: Superheat/subcooling calculator, digital thermometer
- Safety gear: Safety glasses, insulated gloves, non-conductive footwear
Worksite preparation involves methodical safety checks and environmental assessment. Follow comprehensive safety checklists to ensure a secure working environment. Disconnect electrical power sources using proper lockout/tagout procedures, verify adequate workspace lighting, and remove potential tripping hazards.
Proper preparation prevents poor performance – invest time in thorough worksite setup.
Ensure you have clear access to the heat pump system, with sufficient working space to manoeuvre and perform detailed diagnostics. Keep your tools organized and within easy reach to maintain workflow efficiency and minimize unnecessary movement.
Pro tip: Always perform a quick tool inventory before leaving for a job, confirming you have all necessary equipment to complete the heat pump repair in a single visit.
Step 3: Inspect electrical and refrigerant components
Inspecting electrical and refrigerant components is a critical diagnostic step that requires precision and systematic analysis. Thorough electrical system examinations help prevent potential failures and ensure optimal heat pump performance for Canadian technicians.
Begin your comprehensive inspection by examining electrical components:
- Check wiring connections for signs of corrosion or wear
- Test electrical capacitors using a multimeter
- Evaluate relay and contactor functionality
- Measure voltage across electrical terminals
- Inspect insulation integrity on all electrical connections
Next, transition to refrigerant system diagnostics. Critical refrigerant charge inspections involve using specialized equipment to assess system performance and detect potential leaks. Employ your manifold gauge set to measure refrigerant pressure levels and compare them against manufacturer specifications.
Precision in electrical and refrigerant inspections determines heat pump reliability and efficiency.
Carefully document your findings, noting any deviations from standard operational parameters. Pay special attention to temperature differentials, pressure readings, and electrical resistance measurements that might indicate underlying system issues.
Pro tip: Always cross-reference your diagnostic measurements with the manufacturer’s original specifications to ensure accurate assessment of component performance.
Step 4: Repair or replace defective parts
Addressing faulty components requires a strategic approach that balances precision, efficiency, and cost-effectiveness for heat pump repairs. When diagnostic testing reveals compromised parts, you’ll need to make critical decisions about repair versus replacement.
Evaluate each component using these systematic guidelines:
- Assess component damage severity
- Compare repair costs against replacement pricing
- Consider manufacturer warranty implications
- Check availability of direct replacement parts
- Determine long-term system performance impact
Follow a methodical replacement strategy for electrical and mechanical components. Prioritise original manufacturer parts whenever possible to maintain system integrity and performance standards. Carefully document each replacement, noting the specific component, model number, and installation date for future reference.
Precision in parts replacement determines the overall reliability and efficiency of your heat pump system.
When removing defective components, use proper decommissioning techniques. Disconnect electrical power, release refrigerant safely, and follow environmental regulations for disposal. Ensure new components are compatible with existing system specifications and properly calibrated during installation.
Pro tip: Photograph the original component configuration before removal to serve as a precise reference during reinstallation, reducing potential reassembly errors.
Consider these common pitfalls and professional strategies in heat pump repairs:
| Common Pitfall | Impact on Repairs | Recommended Professional Strategy |
|---|---|---|
| Skipping safety procedures | Increased risk of injury | Follow industry-standard safety checks |
| Incomplete documentation | Maintenance tracking errors | Use digital, standardised templates |
| Ignoring minor discrepancies | Larger future breakdowns | Address all anomalies promptly |
Step 5: Test system for proper operation
After component replacement and repairs, comprehensive system testing becomes crucial to validate heat pump performance and ensure optimal functionality. Rigorous system performance testing enables Canadian HVAC technicians to confirm precise operational standards and detect any remaining issues.
Conduct a systematic operational test using these critical verification steps:
- Measure air volume output
- Check temperature differentials
- Verify refrigerant pressure
- Test electrical system response
- Evaluate heating and cooling cycles
- Monitor energy consumption
Power up the heat pump system gradually, observing each operational stage carefully. Monitor temperature transitions, listening for unusual sounds and watching for smooth mechanical movements. Record all performance metrics, comparing them against manufacturer specifications to ensure complete system restoration.
Methodical testing transforms repairs from guesswork into precise engineering.
Pay special attention to system efficiency metrics. Confirm that temperature differentials match expected ranges and that electrical components respond consistently across various operational modes. Your final assessment should demonstrate restored system integrity and optimal performance levels.
Pro tip: Use digital diagnostic tools to create a comprehensive performance baseline, allowing you to track system health and detect potential future issues proactively.
Step 6: Document service and customer feedback
Comprehensive documentation serves as the backbone of professional HVAC service, providing a detailed record of your technical interventions and customer interactions. Effective documentation protects both the technician and the client by creating a transparent, accountable service workflow.
Ensure your service documentation includes these critical elements:
- Detailed repair history
- Component replacement log
- System performance measurements
- Diagnostic test results
- Customer satisfaction notes
- Recommended future maintenance
Create a systematic documentation process that captures every significant aspect of the heat pump service. Use digital reporting tools to generate precise, legible records that can be easily shared with customers and retained for future reference. Include photographs of key repair points, serial numbers of replaced components, and specific performance metrics.
Meticulous documentation transforms routine service into professional, trackable technical work.
Encourage customer feedback by providing a clear, simple mechanism for clients to share their experience. This not only helps improve your services but also demonstrates your commitment to transparency and continuous improvement in heat pump maintenance.
Pro tip: Develop a standardised digital template for service reports to ensure consistent, comprehensive documentation across all heat pump repair assignments.
Elevate Your Heat Pump Repair Expertise with Trusted Support
Mastering the detailed steps from system diagnostics to final testing is essential for every Canadian HVAC technician seeking to deliver reliable heat pump repairs. When facing complex challenges like precise refrigerant measurements or meticulous electrical inspections, having access to quality parts and expert backing can make all the difference. Avoid common pitfalls such as skipping safety procedures or missing documentation by equipping yourself with professional-grade tools and trusted service solutions.

Ready to transform your heat pump repair workflow into streamlined, confident performance Discover how heat pump installation in appliance repair can support your work with original components and comprehensive consultation. Visit CoolFix now to explore dependable solutions designed specifically for Canadian HVAC professionals Ensure your next repair is efficient and professional by partnering with experts who understand your needs. Act now to secure your toolkit and service reliability at CoolFix.
Frequently Asked Questions
What are the initial steps to diagnose a heat pump system?
Begin by assessing the system status through a thorough visual inspection. Check electrical connections, refrigerant pressure levels, and compressor functionality, while recording precise measurements for future reference.
How can I prepare my workspace before starting heat pump repairs?
Secure your worksite by ensuring safety checks are in place. Gather essential tools, including hand tools and electrical instruments, and organize them for easy access to maintain an efficient workflow.
What tools are essential for inspecting electrical and refrigerant components?
Key tools for inspecting these components include a multimeter for testing voltage and resistance, a pressure gauge for measuring refrigerant pressure, and an infrared thermometer for monitoring surface temperatures. Use these tools to conduct thorough diagnostics on your heat pump system.
How do I determine whether to repair or replace a defective part?
Assess the severity of the component damage and compare the costs of repair versus replacement. Consider the long-term system performance impact, and always prioritise original manufacturer parts when possible.
What steps are involved in testing a heat pump system after repairs?
Conduct a systematic test that measures air volume output, temperature differentials, and refrigerant pressure. Verify electrical system responses and monitor energy consumption to ensure the heat pump operates within manufacturer specifications.
Why is documentation important after service completion?
Meticulous documentation creates a transparent record of your interventions and customer interactions. Include repair history, component replacements, and customer feedback to improve service quality and support future troubleshooting efforts.
Recommended
- Heat Pump Troubleshooting Guide for Canadian Technicians – CoolFix Appliance & HVAC Service
- 7 Best Practices for Heat Pump Repair in Canada – CoolFix Appliance & HVAC Service
- Appliance Repair Heat Pump Guide for Efficient Maintenance – CoolFix Appliance & HVAC Service
- Heat Pump Installer Role: Elevating Installation Skills – CoolFix Appliance & HVAC Service
0 Comments